Home>Articles>The Life of a Pug: Home Improvement & Storage Solutions for Pug Owners

Articles
The Life of a Pug: Home Improvement & Storage Solutions for Pug Owners
Modified: December 7, 2023
Give your beloved pug the home they deserve - from storage solutions to proper living needs, discover how you can create the perfect space.
(Many of the links in this article redirect to a specific reviewed product. Your purchase of these products through affiliate links helps to generate commission for Storables.com, at no extra cost. Learn more)
Introduction
The delightful charm of pugs is undeniable. With their squished faces and curly tails, pugs have become one of the most beloved breeds in the world. However, behind their cute demeanor lies specific needs and attributes, making their care unique. As every pet owner knows, the living environment plays a significant role in the well-being of their pets. For pug owners, merging the essentials of home improvement with the distinctive characteristics of pugs can ensure both a stylish home and a happy pug. This guide delves into understanding the pug breed and how homeowners can optimize their living spaces for these little canines.
Understanding Pug Characteristics and Needs
Pugs are a unique breed with specific behavioral patterns and health requirements. They’re known for their playful demeanor, but did you know about their sensitive nature? As you dive into understanding their characteristics, you’ll uncover the need for specific training, perhaps using resources that touch on dog behavior, or the importance of selecting the right diet, including decisions about how to store canned dog food.
Originating from China and boasting a history that spans centuries, the pug is a breed known for its compact size and distinctive appearance. Standing at around 10 to 14 inches tall and weighing between 14 to 18 pounds on average, these dogs may be small, but they come with a big personality.
Often described as “a lot of dog in a small space,” pugs are known for their playful, affectionate, and sometimes stubborn temperament. They crave human companionship and often suffer from separation anxiety if left alone for extended periods. Hence, a home that caters to their emotional needs is as vital as their physical ones.
Being brachycephalic, pugs have short, flat noses, which can lead to respiratory issues, making it crucial for them to stay in environments that aren’t too hot or humid. Moreover, their double coat, though short, sheds profusely, especially in warmer months. This shedding implies homeowners will have to think about aspects like flooring and furniture choices, as well as regular grooming routines.
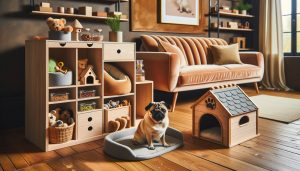
Creating a Pug-Friendly Living Space
To truly make your home pug-friendly, it’s essential to be attuned to their needs. Pugs love comfort, so consider adding plush dog beds, especially those recommended among the 10 amazing dog beds for 2023. Also, the inclusion of toys and play areas, safely stored using the best dog storage solutions for 2023, will keep them entertained.
While pugs love to play, they are equally fond of their nap time. Investing in a comfortable dog bed, preferably with orthopedic support, can provide your pug with a cozy retreat. Pugs also love to be where their humans are. So, if you spend a lot of time in a particular room, ensure there’s a comfy spot for your pug there, too.
Given their strong need for companionship, consider integrating pet-friendly furniture or dedicated dog spaces in the main living areas. Modern home improvement trends showcase innovative ideas like built-in dog beds or pet nooks under staircases, making the living area inclusive for the pug without compromising on aesthetics.
Flooring and Pugs
Pugs, like many small dog breeds, can sometimes struggle with slippery floors, leading to potential injuries. Owners should be aware of peculiar behaviors like why does my dog take food out of his bowl and put it on the floor? or the more common observation, why does my dog prefer to sleep on the floor? Opting for non-slip mats or textured flooring can help pugs navigate the home with ease.
Hardwood flooring, while aesthetically pleasing, can sometimes be too slippery for pugs, leading to potential injuries. If hardwood is your choice, ensure it’s sealed correctly to prevent damage from potential pug “accidents” and consider adding area rugs for traction. The rugs can be periodically cleaned or replaced, ensuring the living space remains fresh.
Vinyl and laminate flooring have risen in popularity among pet owners. They are resistant to scratches, easy to clean, and offer a good grip for pugs on the move. Tile flooring, especially in hotter climates, can be a boon. They are cool to the touch, providing pugs with a refreshing spot to lie on during warm days.
In essence, flooring in a pug-friendly home should balance aesthetics, durability, and the comfort of the pet. With the myriad of options available today, homeowners can easily find a solution that caters to all these requirements.
Storage Solutions for Pug Toys & Accessories
With toys, leashes, and grooming tools, a pug’s accessories can quickly accumulate. Investing in storage solutions, perhaps inspired by the 15 best dog storage for 2023, can ensure a clutter-free environment. Whether it’s a dedicated doggy drawer, baskets, or even custom-made cabinets, proper storage will help keep your pug’s belongings organized and easily accessible.
Modular storage systems have gained popularity in recent years. These units, often customizable, allow homeowners to adapt storage as per the pug’s growing collection of toys. Bins or baskets labeled for specific toys can make accessing them easier while ensuring that playtime remains organized.
Furthermore, wall-mounted storage units can be a game-changer, especially in homes with limited floor space. These systems, often used for human accessories, can be repurposed for pug paraphernalia. Pegboards, for instance, can hold leashes, collars, and even small toys, keeping them off the floor but within easy reach.
Consider the use of underutilized spaces: the area under the bed or couch can house flat storage boxes perfect for toys and accessories. The key is consistency. Regularly returning items to their designated spots will ensure a tidy home while guaranteeing that your pug’s favorite toy is always at hand.
Read more: Who Is The Owner Of Millennium Alarm Systems
Feeding Stations & Storage
Dedicated feeding stations can make mealtimes structured for your pug. Raised dog bowls can aid digestion, and mat placements can ensure minimal mess. After feeding, proper storage is crucial. Whether you’re looking for ways to store wet dog food or guidance on how to clean a dog water dispenser, ensuring the freshness and hygiene of your pug’s meals is paramount.
Dedicated drawer systems or pull-out cabinets in your kitchen can be adapted for storing dog food, treats, and other feeding accessories. Storing food in airtight containers within these systems can ensure freshness and keep potential pests at bay.
For those looking to integrate technology, smart pet feeders with storage solutions are available. These devices not only dispense food at programmed intervals but also come with built-in storage, ensuring that the kibble remains fresh.
Lastly, while functionality is crucial, aesthetics shouldn’t be compromised. Customized feeding stations, matching your home’s decor, can be both functional and stylish. Personalized bowls, placemats, and treat jars can make feeding time special while ensuring that the area aligns with the overall design theme of your home.
Creating a Pug Resting Nook
Every pug deserves a special corner in the house where they can retreat and relax. Whether it’s after a long play session or just their afternoon nap, ensuring they have a cozy nook is essential. Start with a comfortable bed, perhaps one from the 10 amazing dog beds for 2023. Add in some soft blankets and a favorite toy. If your pug has a peculiar preference like sleeping on the floor, consider placing a plush mat in their corner.
An orthopedic bed, considering the breed’s susceptibility to joint issues, can be a worthy investment. These beds offer optimal support and can be housed within customized nook designs. Think of built-in alcoves, under-stair spaces, or even repurposed closets. Add in soft blankets, and maybe a favorite toy, to enhance the coziness.
Lighting plays a significant role too. Soft, ambient lights can create a calming environment, perfect for napping. For homeowners willing to go the extra mile, soundproofing the nook can ensure that the pug remains undisturbed, offering them a serene retreat within the home.
Dealing with Pug Shedding
Pug owners know all too well about the shedding season. Those tiny hairs can be found everywhere, from couches to carpets. Regular grooming can help control this. Investing in the right dog grooming tools and perhaps even creating a routine around pug bathing & grooming can minimize the hair fallout. Additionally, vacuuming regularly and having lint rollers at hand can keep your home hair-free.
For homes with upholstery, anti-shedding sprays are available. These solutions, applied directly to furniture, can reduce fur adherence. Similarly, choosing furniture covers made of materials resistant to fur adherence can be beneficial. These covers can be periodically washed, ensuring that your furniture remains fur-free.
Vacuum cleaners designed specifically for homes with pets can be game-changers. These machines, often equipped with specialized attachments, can effectively pick up pet hair from various surfaces. Robotic vacuums, with their scheduled cleaning cycles, can also be beneficial in maintaining a fur-free environment.
Incorporating air purifiers can assist in reducing pet dander, ensuring a healthier living environment. With the right tools and routines in place, managing pug shedding becomes less daunting, allowing homeowners to enjoy the joys of pug ownership without the constant fur dilemma.
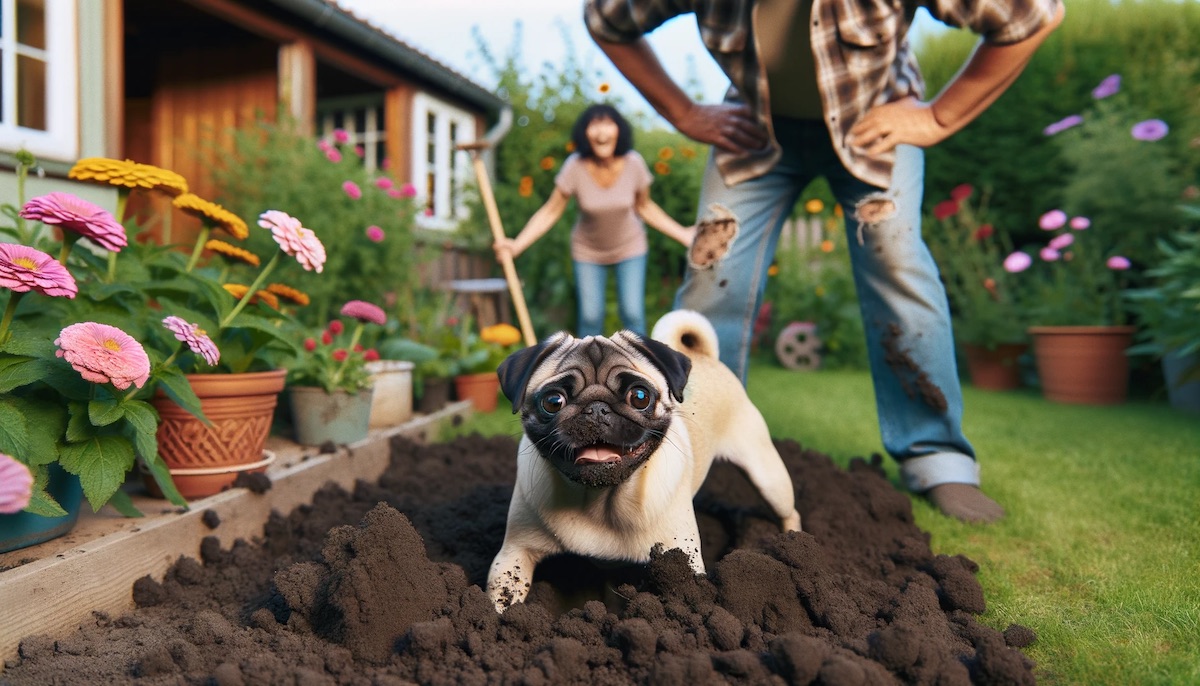
Outdoor Spaces for Pugs
While pugs are not as high-energy as some other breeds, they still benefit from time outdoors. Designing a safe and engaging outdoor space is crucial. Considerations include ensuring they can’t escape by jumping on the fence or finding ways to keep them out of specific garden areas. Provide shaded areas for hot days and ensure there’s fresh water available, perhaps using a dog water dispenser that’s regularly cleaned.
A fenced yard is fundamental. Not only does this provide a safe environment for pugs to play in, but it also ensures they can’t wander off. However, with pugs’ curious nature, ensure the fence is both high enough to deter jumpers and anchored deep enough to prevent diggers from making an escape.
Landscaping plays a crucial role too. Opt for non-toxic plants, given that pugs, in their playful curiosity, might decide to have a nibble. Soft grassy patches are ideal for play, while shaded areas are a must, given the breed’s sensitivity to heat. Consider pergolas or shade sails for sunny areas.
While water features can elevate the aesthetics of a garden, safety barriers are essential if you have a pond or pool. Pugs aren’t the best swimmers, so preventing accidental falls is paramount. If you decide to allow your pug near water, always supervise and consider a doggie life jacket for added safety.
Pug Bathing & Grooming Station
Regular bathing and grooming are essential for pugs, not just to keep them looking sharp, but also for their overall health. Setting up a dedicated station for your pug’s grooming can streamline this process. Begin by selecting the right dog grooming tools. Having a dedicated space helps in reducing the mess associated with baths and grooming. For tips on maintaining cleanliness, consider guidelines on how to clean a dog water dispenser, which can provide insights into keeping the grooming area spick and span.
Elevated bathtubs or sinks, often found in modern pet stores, can prevent back strains for owners and offer a secure bathing space for pugs. These tubs typically come with adjustable restraints, ensuring the pug remains still during the bath. Incorporate a handheld showerhead for easier rinsing and a non-slip mat to prevent accidents.
Storage within the grooming station is essential. From shampoos, conditioners, and brushes to nail clippers and ear cleaning solutions, having everything in one place ensures efficiency. Consider wall-mounted cabinets or under-sink storage solutions.
For the drying process, an absorbent microfiber towel can work wonders. If you opt for a blow dryer, ensure it’s set to a cool setting to prevent skin burns. A grooming table with a non-slip surface can be beneficial for post-bath brushing and other grooming tasks.
Safety Precautions in Home Design
When designing or modifying a home with a pug in mind, safety should be paramount. Watch for common hazards like stairs, especially if your pug exhibits behaviors like being scared of stairs or refusing to go up them. Solutions might include dog ramps over stairs or teaching your pug to navigate stairs safely. Also, be mindful of chewable items and electrical cords, ensuring they’re out of reach.
Stairs can pose a challenge, especially for older pugs. Non-slip stair treads or even baby gates can prevent accidental tumbles. Similarly, balconies or high patios should have secure railings to ensure pugs can’t slip through or jump off.
Electrical cords, a chewing temptation for many dogs, should be concealed or protected. Consider cord covers or even cordless appliances in areas the pug frequents. Small objects, with potential choking hazards, should be stored securely, preferably in cabinets or containers that a pug can’t open.
Finally, household cleaners, some of which can be toxic to pets, should be stored out of reach. If possible, opt for pet-safe cleaning products to ensure even accidental exposure doesn’t lead to health issues.
Climate Control and Pugs
Pugs are sensitive to extreme temperatures due to their short snouts. In summer, homes should be well-ventilated and cool, possibly aided by climate control systems. For colder seasons, ensure your pug has a warm spot, like a heated bed. Owners should be observant if their pug starts displaying unusual behaviors like licking the furniture, which could indicate discomfort or other underlying issues.
Air conditioning during hot months can be a lifesaver. However, ensure the airflow is gentle and not directly blowing onto the pug. Ceiling fans can circulate air effectively, but ensure they are set to rotate in the correct direction for the season – counterclockwise for cooling and clockwise for warming.
During colder months, while heating is essential, ensure that direct heat sources, like heaters or fireplaces, are shielded. Pugs, in their quest for warmth, might get too close, risking burns. Heated pet mats or beds can offer warmth, but always check they are set to a safe temperature.
Humidity control is equally crucial. Dehumidifiers in humid areas can prevent respiratory issues, while humidifiers in dry regions can ensure the pug’s skin doesn’t get too dry.
Traveling with Pugs
Traveling with pugs can be a delightful experience, but it requires preparation. Ensure you have the essentials, including food stored appropriately, maybe in a pug-specific lunch box or any of the amazing dog lunch boxes available in 2023. Familiar items like their favorite toys or blankets can help ease the stress of travel. Always ensure your pug is secure during car journeys and has access to fresh water, possibly from a clean dog water dispenser.
Firstly, choosing an appropriate carrier is vital. Hard-sided carriers with ample ventilation can provide a secure environment for pugs, especially during air travel. Most airlines have specific requirements for pet carriers; ensure yours meets these standards. Within the carrier, a comfortable mat and familiar toys can provide comfort and reduce stress.
Car travel requires equal diligence. Seatbelt harnesses or car seats designed for dogs can ensure the pug remains safe even during sudden stops. Ensure the car is well-ventilated and avoid direct sun exposure, especially during warm months.
Regardless of the mode of transport, regular breaks are essential. Allow your pug to stretch, hydrate, and relieve themselves. Keep a travel-friendly water bowl and some snacks handy.
Lastly, familiarize yourself with pet policies if you’re staying at hotels or other accommodations. More importantly, keep a copy of your pug’s medical records and know the location of the nearest vet, just in case.
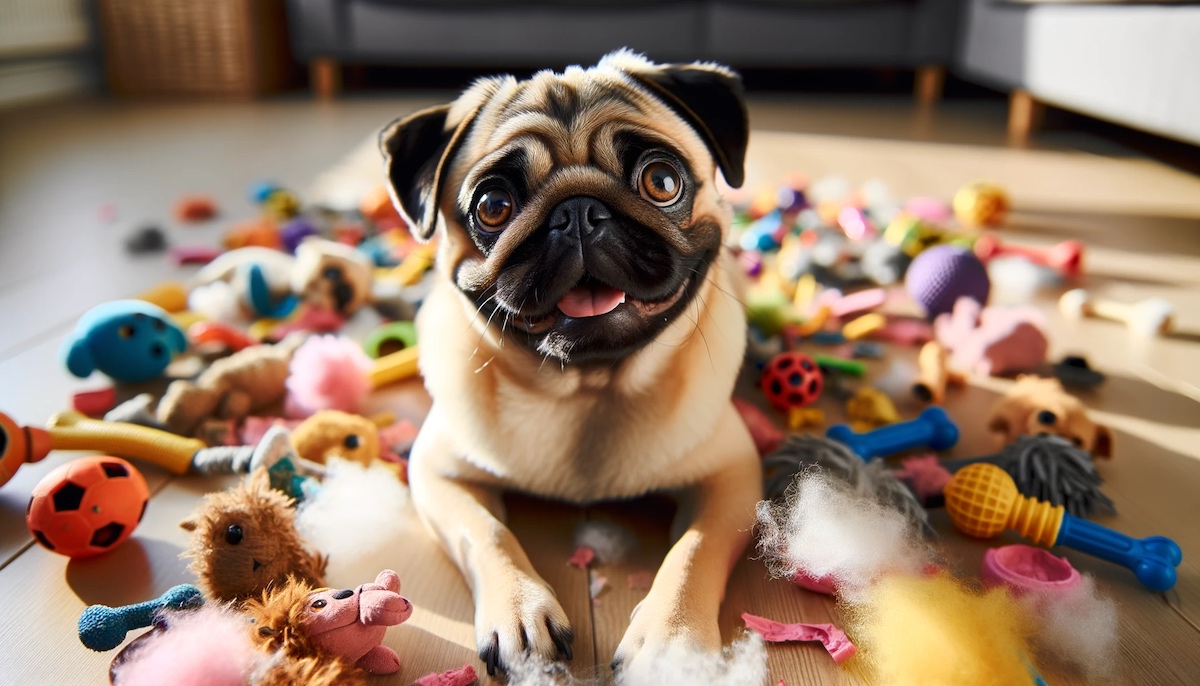
Entertainment Solutions for Pugs
Pugs are playful creatures, and keeping them entertained is vital for their mental well-being. From chew toys to puzzle games, it’s essential to have a mix that caters to their curiosity. Consider organizing these toys using some of the 15 best dog storage solutions for 2023. If you ever notice odd behaviors like your pug taking food out of his bowl and putting it on the floor, it might be an indication that they’re looking for more stimulating activities.
Interactive toys, such as puzzle feeders, can provide mental stimulation. These toys, which dispense treats when solved, can keep a pug occupied for hours. Similarly, chew toys can be both entertaining and beneficial for dental health.
Modern technology offers unique solutions too. Pet cameras, often equipped with treat dispensers and two-way communication, allow owners to interact with their pugs even when away. Some even have laser pointers or interactive games to engage the dog.
For physical activity, play tunnels or agility courses, scaled for indoor use, can be fun and provide exercise. However, ensure any activity aligns with the pug’s physical capabilities to avoid overexertion.
Lastly, never underestimate the power of human interaction. Regular play sessions, be it tug-of-war or fetch, can strengthen the bond between owner and pug while ensuring the latter remains entertained.
Training and Obedience
Training is crucial, not just for obedience but also for building a strong bond with your pug. Start early and remain consistent. Use positive reinforcement techniques, and keep training sessions short but frequent. If you face challenges like your pug refusing to go up or down stairs, specific training articles like how to get an old dog up and down stairs or general insights about dog behavior can be handy resources.
Begin training early, ideally during puppyhood. Simple commands like “sit,” “stay,” and “come” form the foundation. Always reward desired behavior with treats or praise, reinforcing positive actions.
Potty training can be a challenge given the pug’s stubborn streak. Consistency is key. Establish a routine, take them out after meals, and always reward successful outdoor bathroom breaks.
Socialization is equally essential. Expose your pug to different environments, people, and other animals early on. This ensures they grow up to be well-rounded and less reactive in unfamiliar situations.
For those struggling with training, professional obedience classes can be beneficial. These classes not only teach the pug but also train the owner on effective communication techniques.
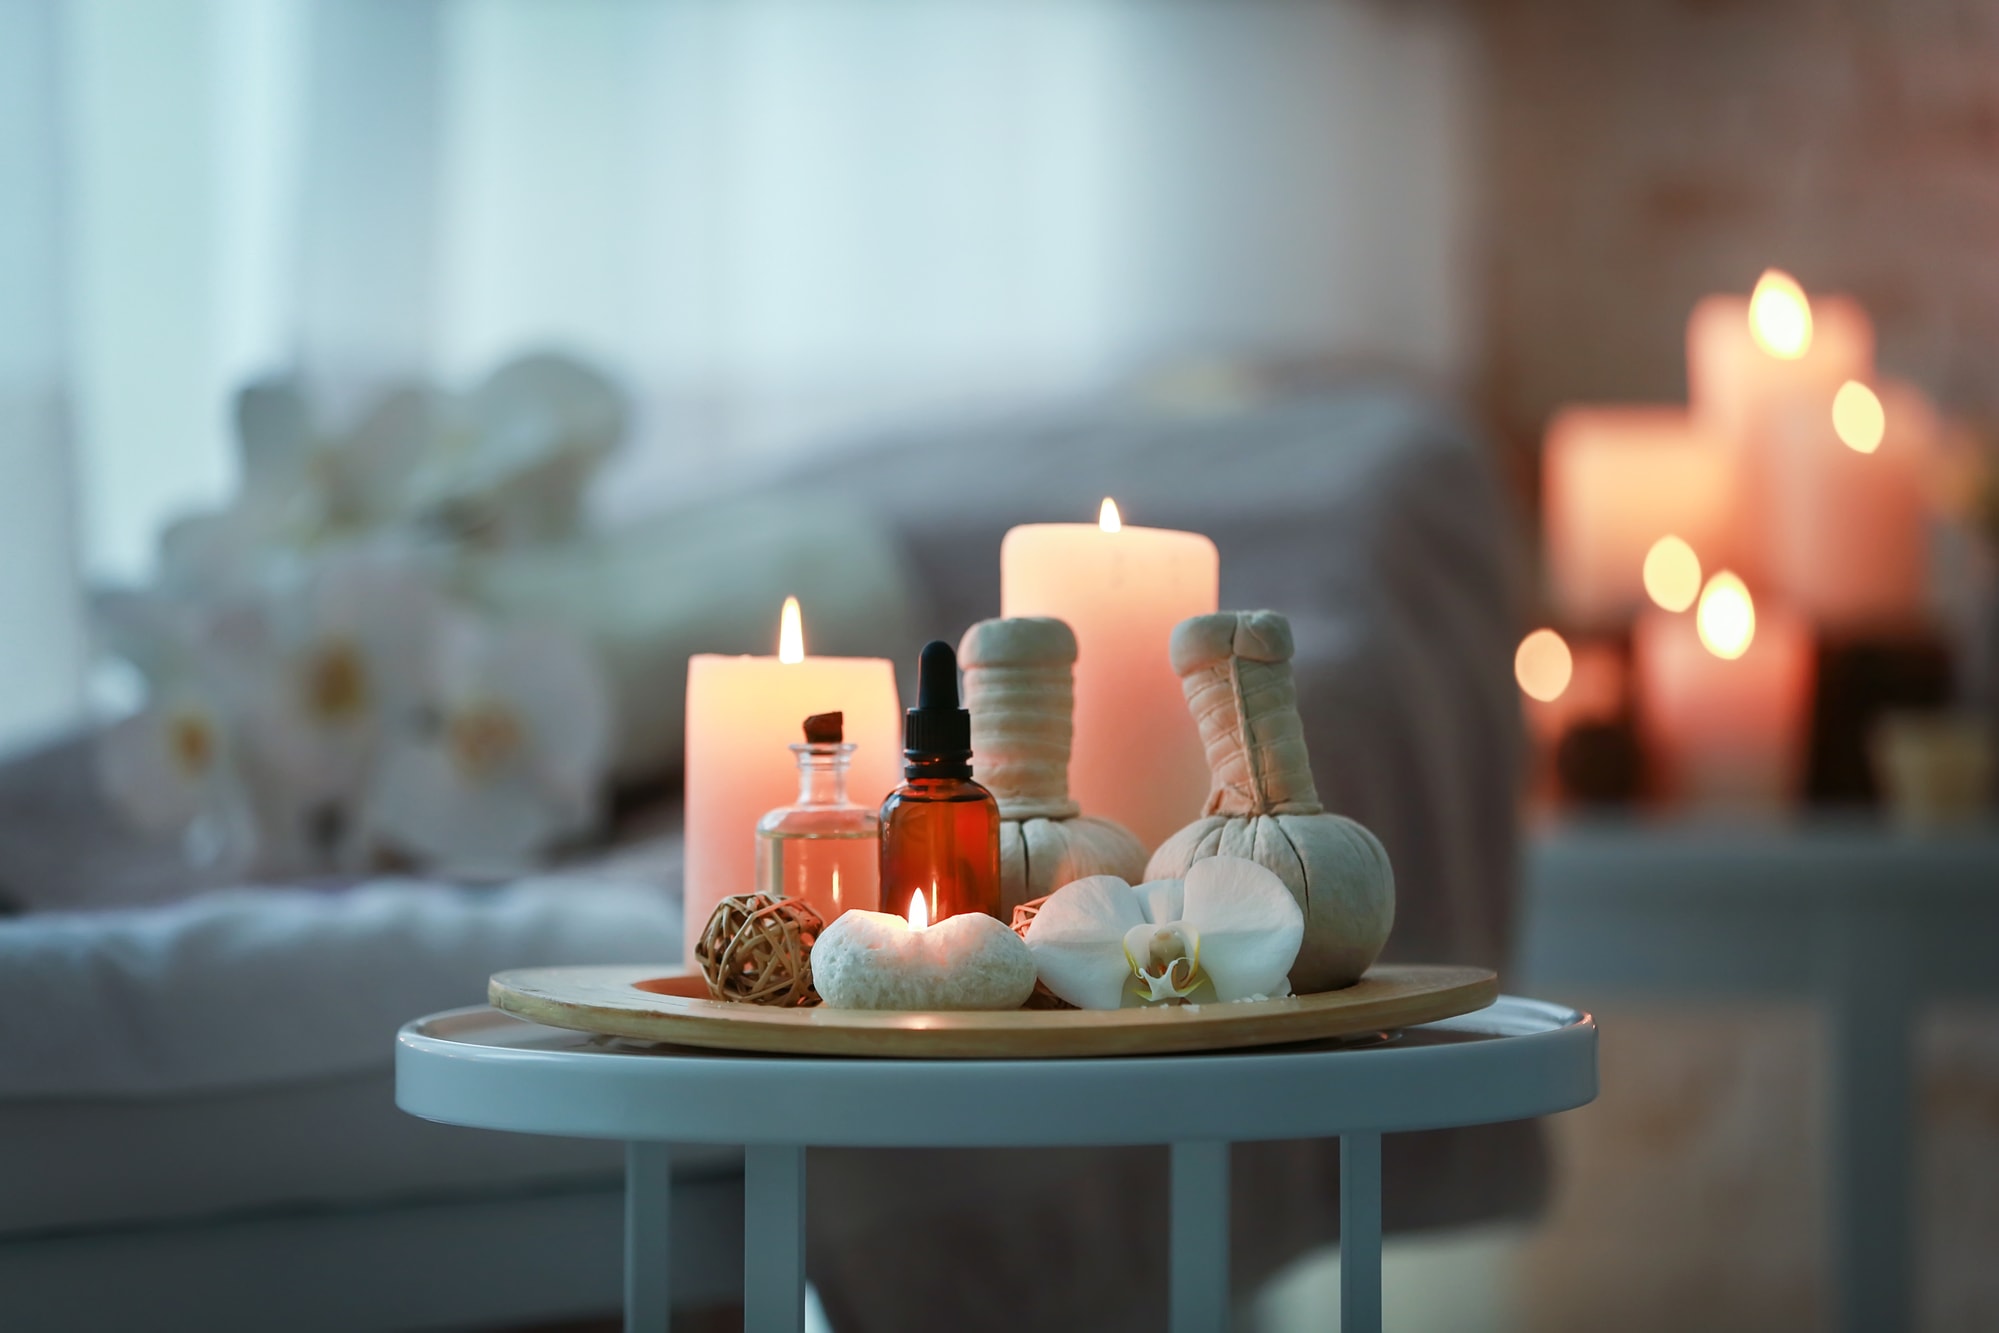
Pug Health & Wellness Corner
Ensuring your pug’s health and wellness should be a top priority. Regular check-ups, a balanced diet, and exercise are fundamental. Be observant of any unusual behavior or patterns. For instance, if your pug starts licking the floor frequently, it might warrant a vet visit. Create a wellness corner at home with all their health essentials, from medications to first aid. Proper storage, like understanding how to store canned dog food, can make this corner efficient and effective.
Maintain a calendar or journal. Track vet appointments, vaccinations, and any medications. Regular check-ups, given the pug’s predisposition to issues like hip dysplasia or respiratory problems, are vital.
Store medications, supplements, and first aid essentials in a dedicated cabinet or box. Always ensure these are out of the pug’s reach to prevent accidental ingestion.
Consider investing in a pet insurance policy. Given the potential health issues associated with the breed, insurance can provide peace of mind and financial relief during emergencies.
Lastly, educate yourself. Understand the breed’s specific needs, familiarize yourself with common symptoms of prevalent diseases, and always maintain open communication with your vet.
Dealing with Aging Pugs
Just like us, our loyal pug companions experience the inevitable march of time. As they transition into their golden years, their needs evolve, requiring specialized care and attention. Recognizing and adapting to these changes can ensure a comfortable and fulfilling senior life for them.
Firstly, health check-ups become increasingly paramount. Regular veterinary visits can catch early signs of age-related issues, be it arthritis, dental problems, or vision loss. Adjustments in their diet, perhaps a switch to senior-specific dog food, can cater to their changing nutritional needs. Ensuring that the food is stored properly, especially if you opt for canned dog food, can help retain its freshness.
Mobility often becomes a concern. Soft orthopedic beds, like the ones listed among the 10 amazing dog beds for 2023, can alleviate joint pains, while non-slip mats around the house can prevent accidental slips. For those whose pets are hesitant or scared of stairs, resources like how to teach a dog to go upstairs or how to build a dog ramp over stairs can be invaluable.
Lastly, cherish every moment. Senior pugs, with their lifetime of loyalty and love, deserve all the affection and care in their twilight years.
Read more: How Technology Affects Home Life
Crafting and DIY for Pug Owners
For the creatively inclined pug owner, delving into DIY projects not only offers a fun hobby but also provides customized solutions for their beloved pets. From handcrafted toys to unique accessories, the possibilities are boundless.
A popular DIY project is sewing personalized dog bandanas or vests. With myriad fabric choices, pug owners can craft seasonal or occasion-specific attire for their companions. Incorporate their names or fun motifs for an added touch. And, speaking of crafting, you might be interested in exploring how to make dog stairs for easier mobility around the house.
Homemade dog treats are another delightful project. With numerous recipes available online, owners can ensure their pugs receive healthy, preservative-free snacks. Silicone molds in fun shapes can add a whimsical element.
Lastly, personalized dog bowls, painted or engraved, can add a unique touch to feeding stations. Just ensure any paints or finishes used are non-toxic and safe for pets.
Home Decor that Celebrates Pugs
Pugs, with their distinct appearance and spirited personalities, have captured the hearts of many. It’s no wonder that many homeowners wish to incorporate pug-centric elements into their home decor.
Wall art is an effortless start. Whether it’s professionally taken photographs of your pug, digital artwork, or even watercolor portraits, displaying them adds a personal touch to any room. Those with a penchant for quirky designs might even find the 13 best pug lunch box for 2023 an eccentric decor choice.
Throw pillows or blankets, adorned with pug motifs, can accentuate living rooms or bedrooms. These can be store-bought or, for a more personalized touch, custom-made.
For book enthusiasts, pug-themed bookends can add a whimsical touch to bookshelves. Or, consider a pug-shaped lamp or clock for an added statement piece.
Reflecting on Pug Companionship
The journey through understanding the multifaceted world of pugs underscores the commitment and joy these pets bring into our lives. From the nuances of their care to the creative ways they can be celebrated in our living spaces, every aspect speaks of the deep bond between pugs and their owners. Embracing this journey enriches not just the life of the pug but that of the owner as well.
Was this page helpful?
At Storables.com, we guarantee accurate and reliable information. Our content, validated by Expert Board Contributors, is crafted following stringent Editorial Policies. We're committed to providing you with well-researched, expert-backed insights for all your informational needs.


0 thoughts on “The Life of a Pug: Home Improvement & Storage Solutions for Pug Owners”